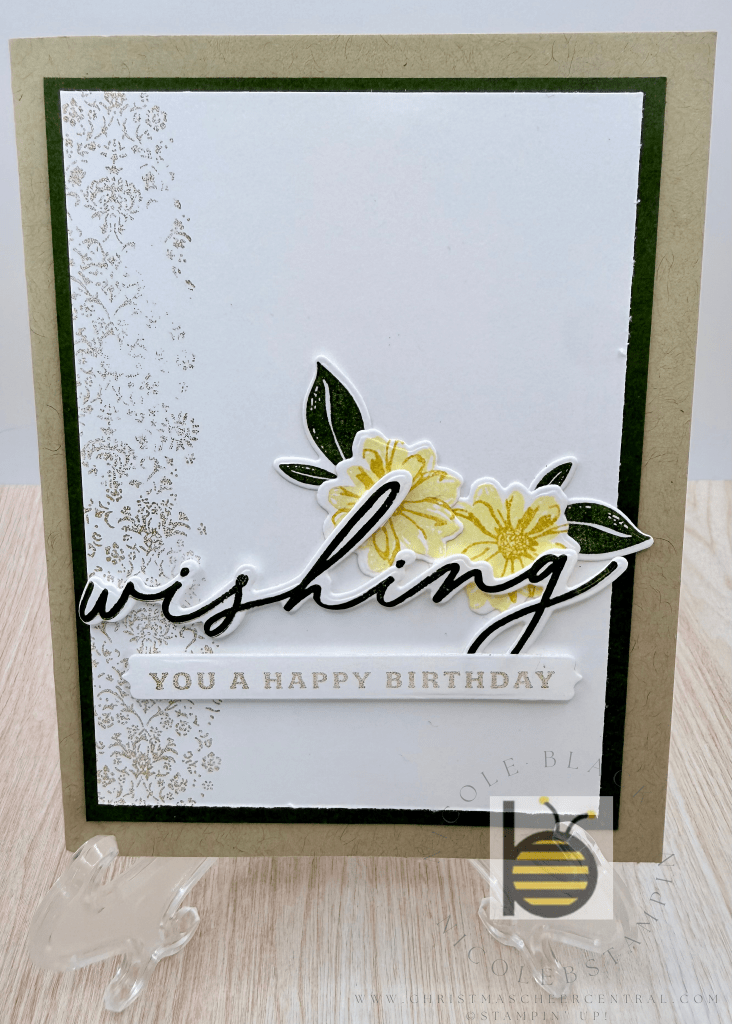
Today’s card features a simple and elegant design using the Delightful Wishes Bundle. Sometimes the most beautiful cards come from clean layouts and a few thoughtful details.
To add a little dimension and help the focal point stand out, I popped up both the “wishing” and the sentiment using mini dimensionals. This small touch gives the card extra depth while still keeping the overall design light and refined.
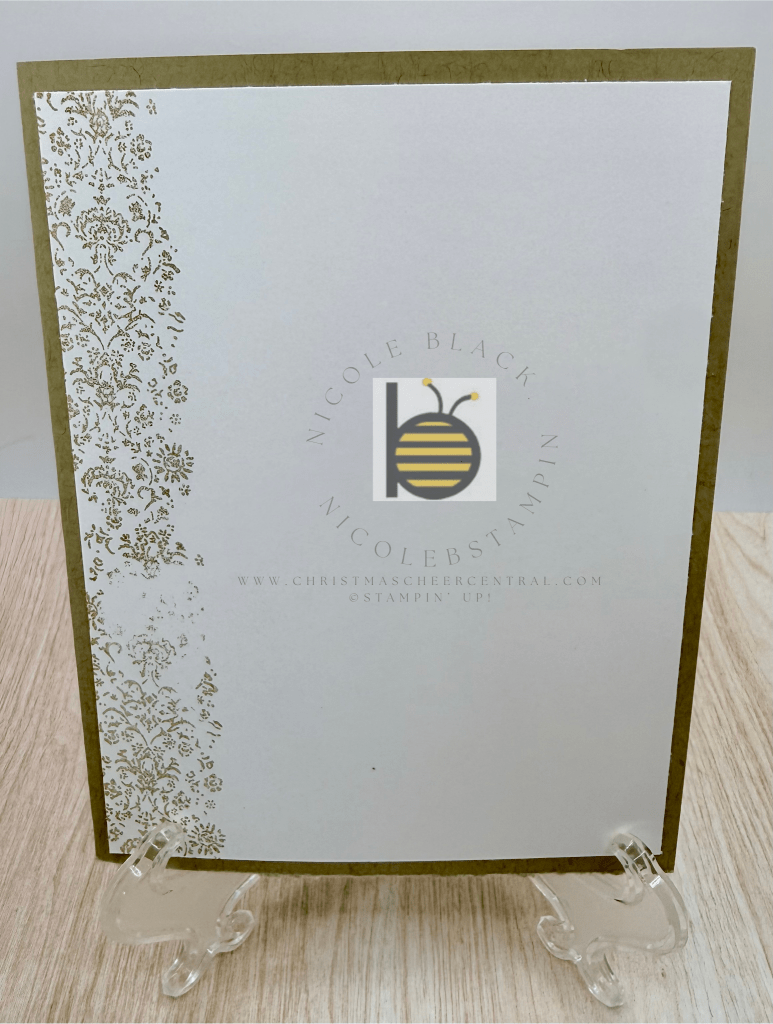
For a bit of subtle texture, I used the patterned stamp from the Beautiful Motifs set to decorate the card front, the inside of the card, and even the envelope. It’s a quick way to create a coordinated look and make the whole project feel just a little more special.
This design is perfect when you want a card that feels polished and elegant but still comes together quickly.
Plan the cheer. Stamp the joy. 🎄 Nicole | nicolebstampin Christmas Cheer Central Christmas planning inspiration and stamping fun all year long
Cardstock Cuts for this project:
Crumb Cake – 8-1/2″ x 5-1/2″ scored at 4-1/4
Mossy Meadow – 5″ x 3-3/4″ Panel
Basic White – 5-1/4″ x 4″ inside panel, 4-3/4″ x 3-1/2″ panel, scrap for die cuts
Stampin’ Up! products used to create this project:
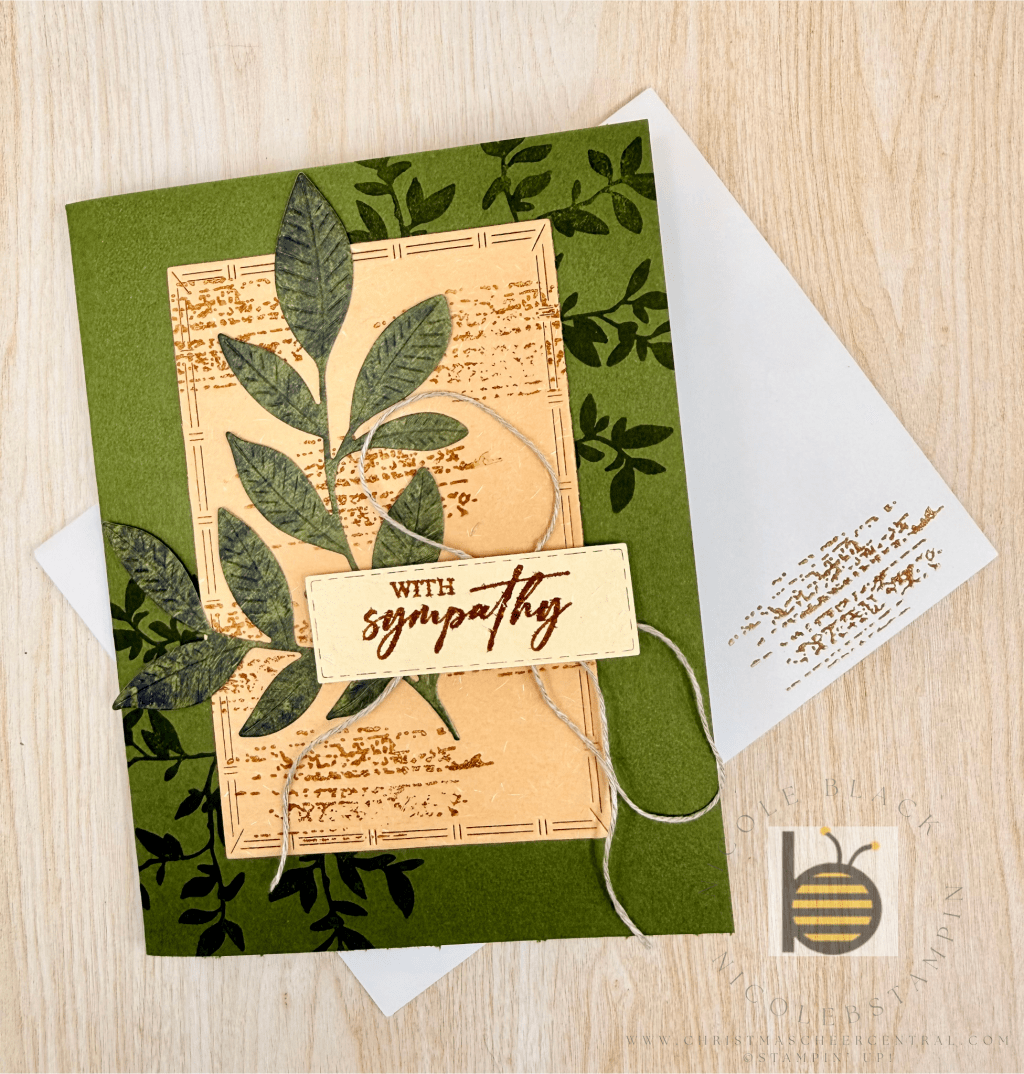
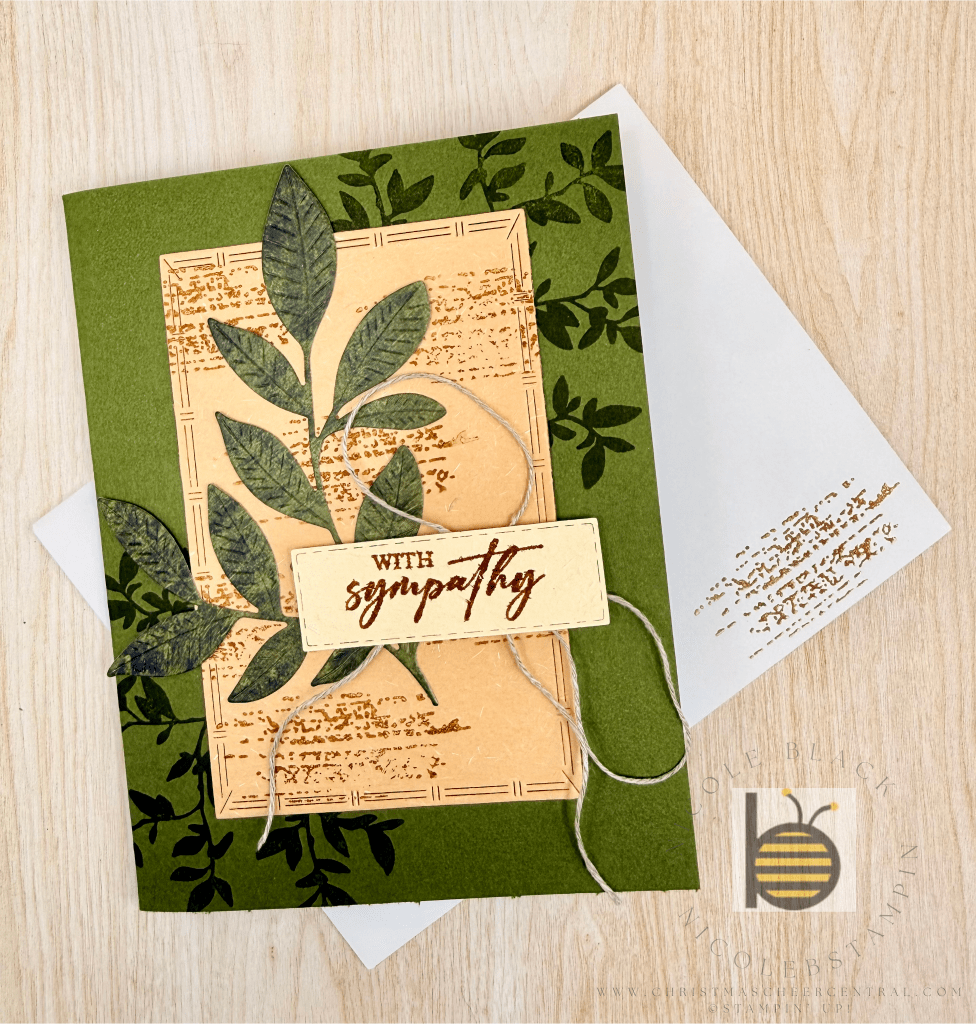
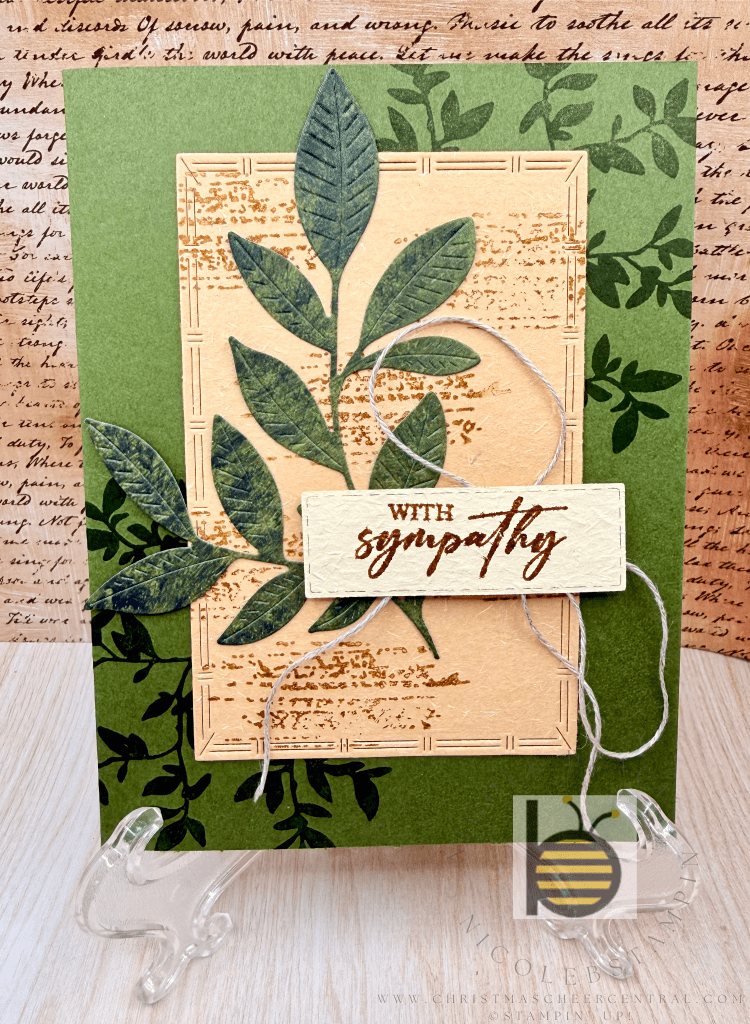
I’m back with another card featuring the Nature Walk Suite, and this time I am featuring the beautiful Natural Hues Specialty Paper. I’m really drawn to the earthy, organic feel of this suite—and I especially love that it’s completely gender neutral. It makes creating masculine cards (or simply understated designs) so much easier!
For this card, I built up the background using stamped textures rather than bold focal images. Layering those subtle stamped details adds depth without overpowering the design. When combined with the rich, natural texture of the Natural Hues Specialty Paper, the result feels cohesive, warm, and grounded.
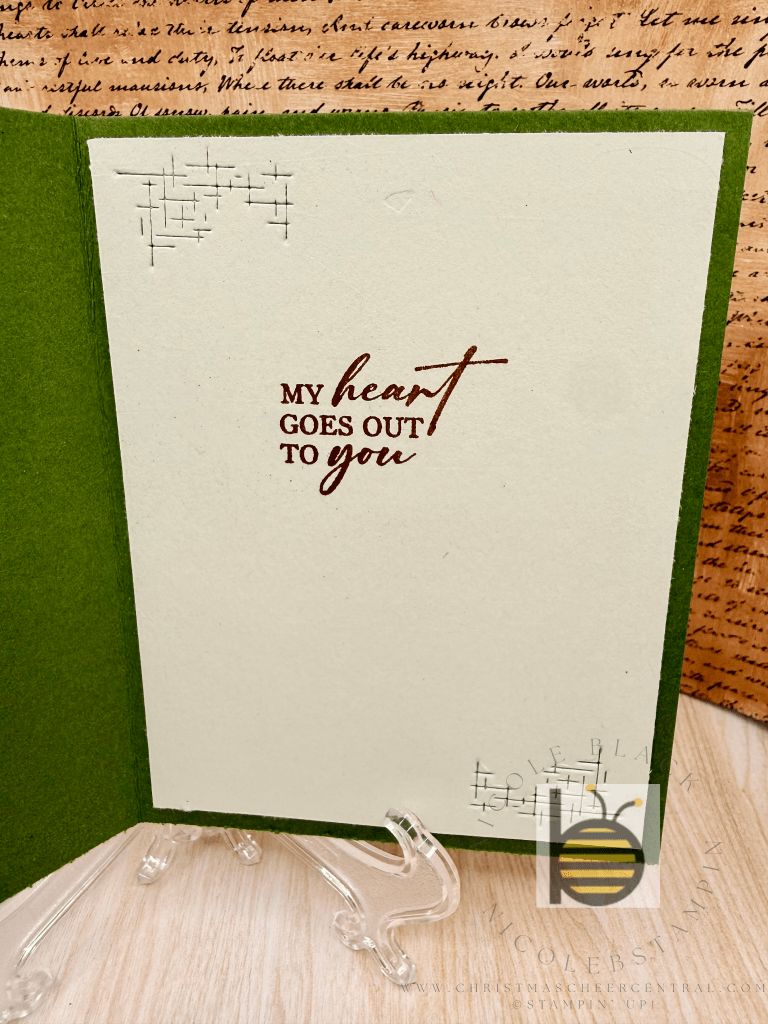
One of my favorite elements in this suite is the texture die. Instead of using additional stamping on the inside of the card, I let the die do the work. It adds just the right amount of interest and dimension while keeping the overall look clean and coordinated.
This suite truly shines when you lean into its natural elements—soft textures, layered neutrals, and simple details coming together for a timeless design.
Cardstock Cuts for this project:
Mossy Meadow – 8-1/2″ x 5-1/2″ scored at 4-1/4
Nature Walk DSP – 4″ x 3-1/2″ for Leaves
Natural Hues – 4-1/2″ x 3″ panel in Tan; 2-1/2″ x 1″ panel in Cream
Basic Beige – 5-1/4″ x 4″ inside panel
Stampin’ Up! products used to create this project:
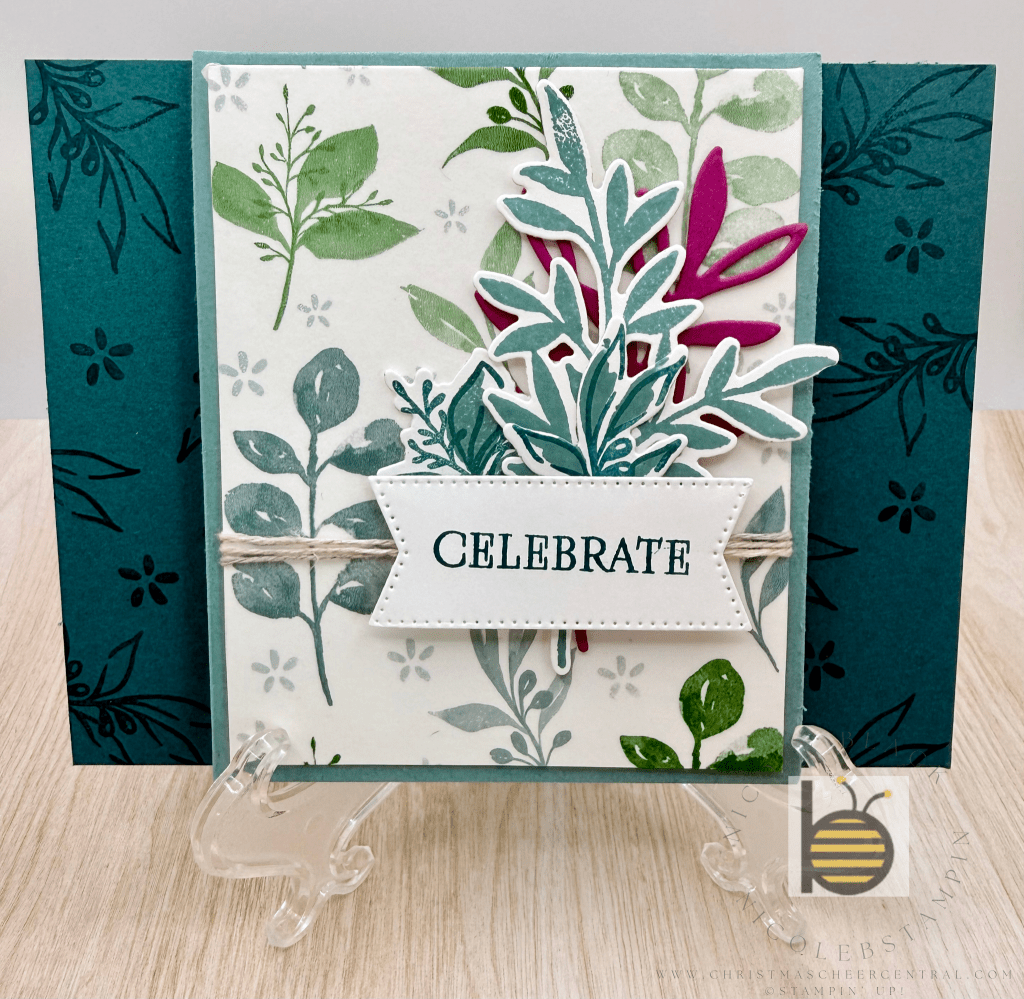
As soon as I flipped through the catalog, I was instantly drawn to the rich colors and natural feel of the Greenery Lane Washi Tape. This card was the perfect opportunity to play with those colors and experiment with a few fun techniques to make something truly unique.
For the background, I combined two simple techniques that add beautiful depth and interest. First, I used a tone-on-tone stamping method by stamping Pretty Peacock ink directly onto Pretty Peacock cardstock. This creates a subtle, textured look that adds dimension without overwhelming the design.
The second technique features the Greenery Lane Washi Tape applied to Basic White cardstock. Layering the Washi Tape this way transforms it into a custom designer paper panel! It’s such an easy way to create a bold focal point with minimal effort. Be sure to check out the video linked below to see exactly how this technique comes together.
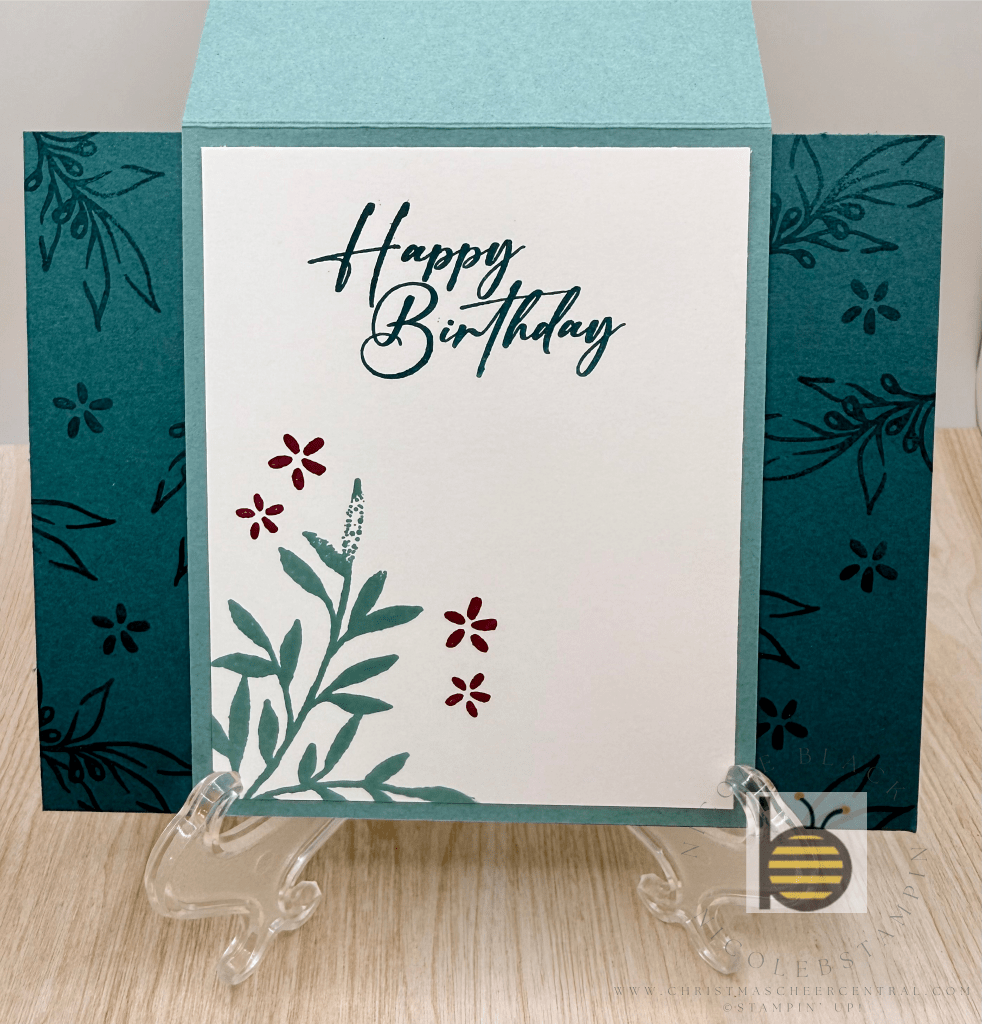
I also switched things up with the card layout. Instead of using a traditional folded card base, I started with a 5-1/2″ x 4-1/4″ Pretty Peacock panel as the foundation. The folded element is adhered directly to this base, creating a fresh twist on a fun fold design. I love experimenting with different structures—it’s an easy way to make a card feel extra special!
This project is a wonderful reminder that a few simple techniques—tone-on-tone stamping, Washi Tape layering, and a creative fold—can turn one set of products into something completely unexpected and fun.
Technique Video:
Learn how to use Washi Tape as a Background.
Cardstock Cuts for this project:
Pretty Peacock – 5-1/2″ x 4-1/4″ base panel
Lost Lagoon – 8-1/2″ x 3-1/2″ (scored at 4-1/4)
Berry Burst – 3-1/4″ x 2″ for Leaf Die
Basic White – 4″ x 3-1/4″ inside panel, 4″ x 3-1/4″ panel, 3-1/4″ x 3-1/2″ for leaves Dies, 1″ scrap for Label Die
Stampin’ Up! products used to create this project:
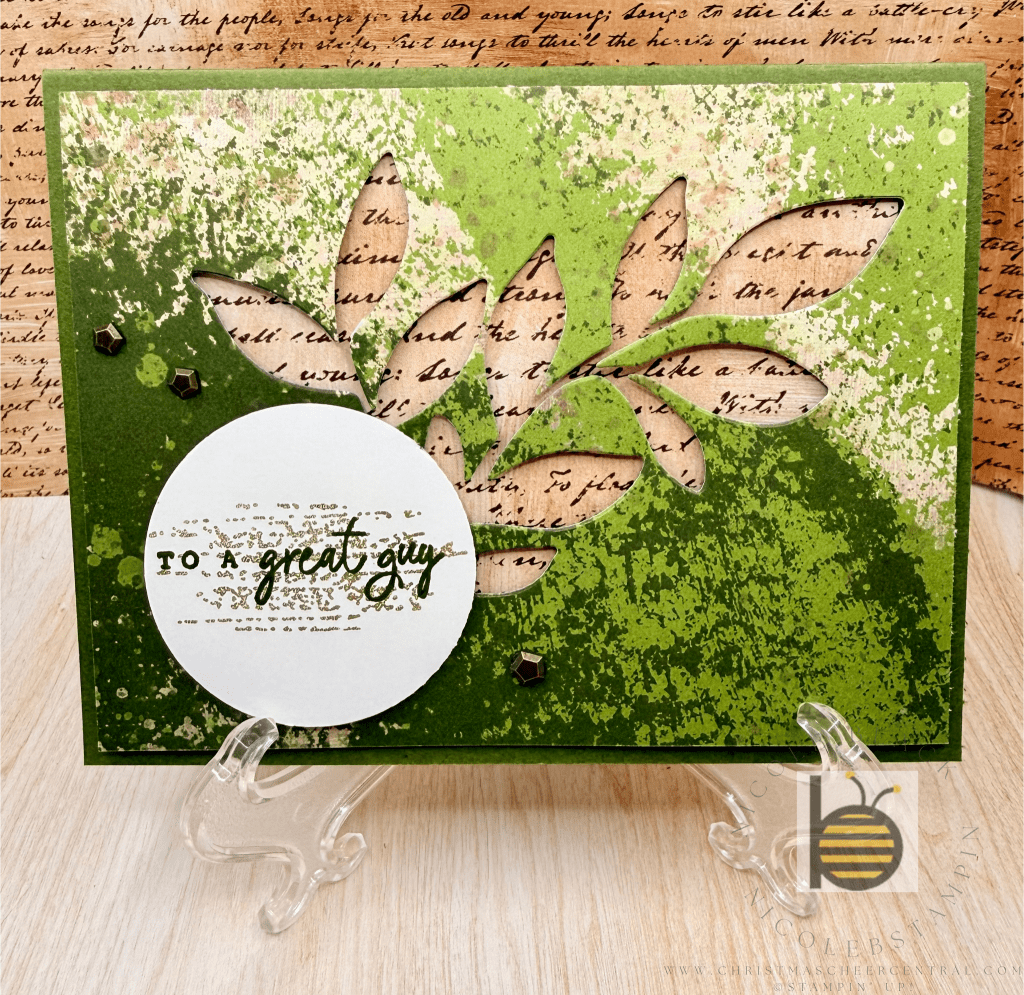
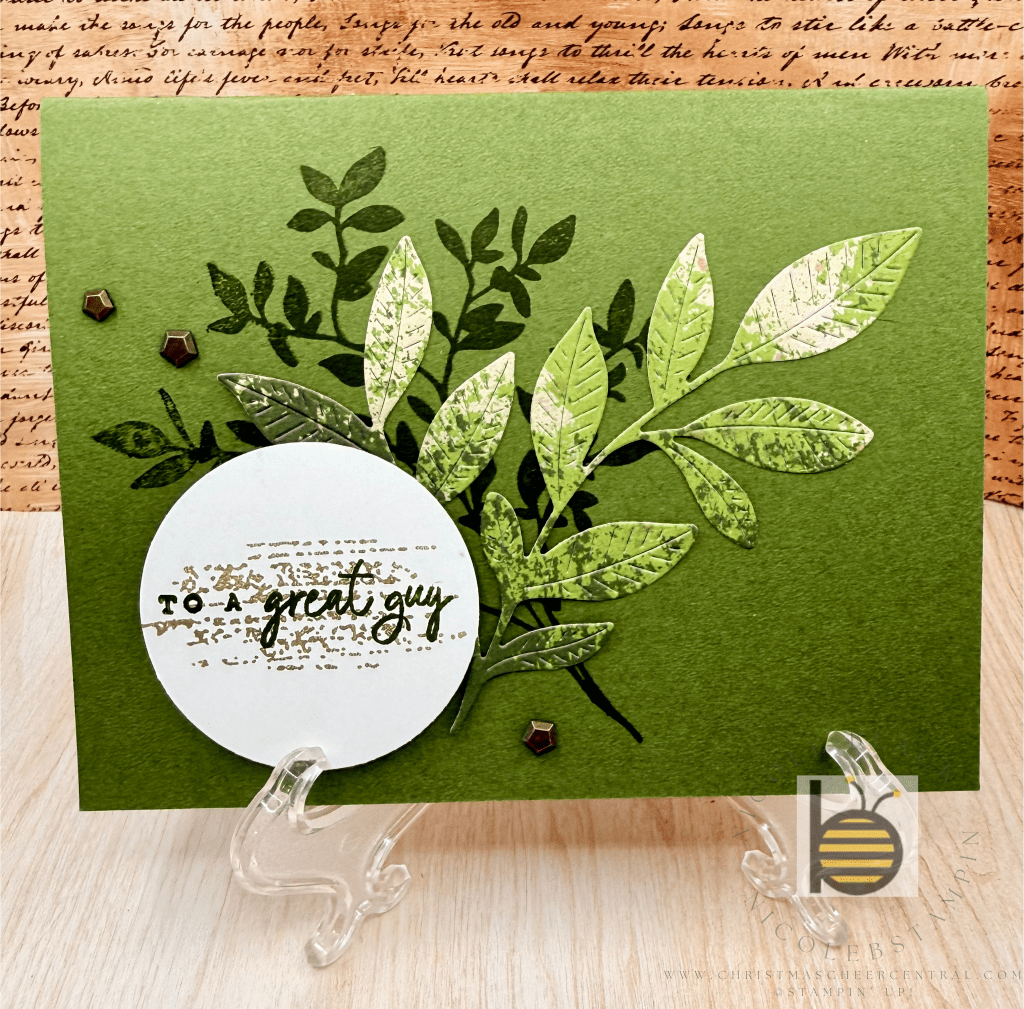
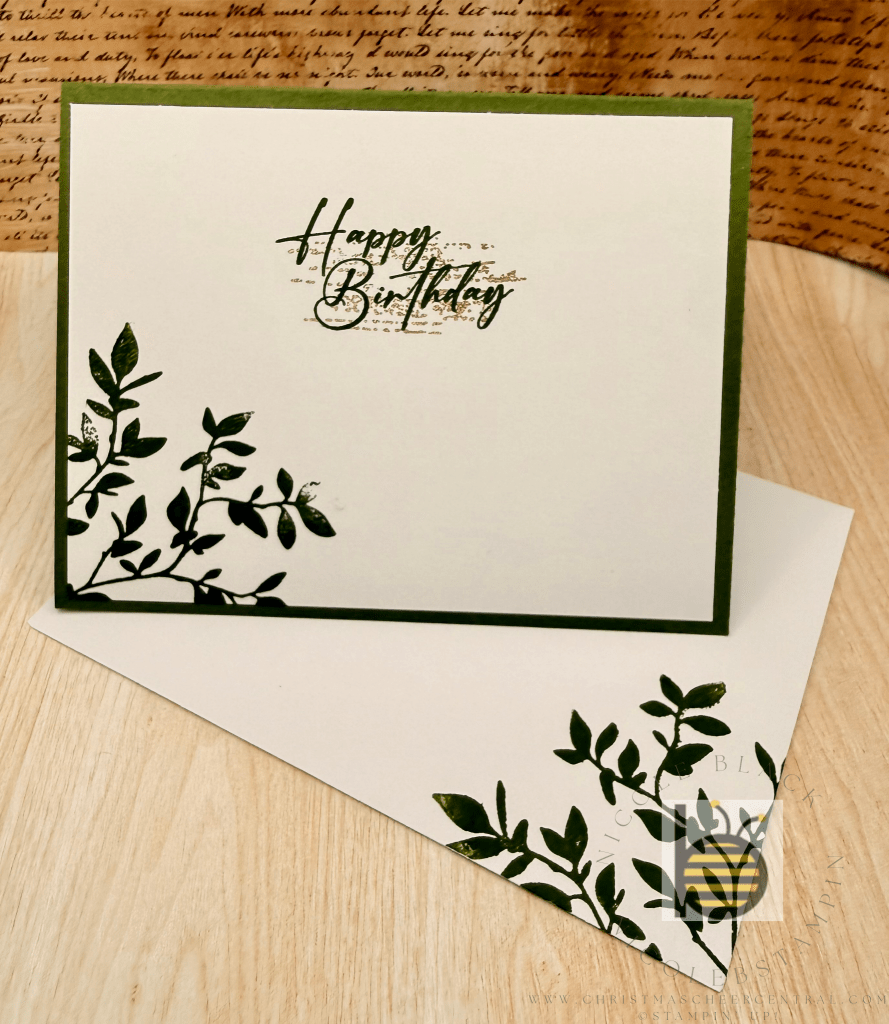
I love it when a card design comes together with zero waste — especially when it uses up every last bit of beautiful paper. This set of cards featuring the Nature Walk DSP does exactly that! And as an added bonus, they’re perfect “guy cards.”
Let’s be honest — I never seem to have a masculine card ready when I need one. So lately, I’ve been intentionally designing cards that work beautifully for men, especially birthdays.
For the first card, I used the negative piece of the patterned paper after die-cutting the leaf. Instead of discarding it, I layered it over a coordinating script pattern from the same DSP and popped it up for dimension. The layered look adds subtle texture while still keeping the design clean and masculine.
For the second card, I used the actual leaf that I die-cut. On this version, I adhered the leaf directly to the card front for a flatter finish. However, next time I plan to pop up the leaves with dimensionals to create even more depth and visual interest.
The rest of the card design — including the inside — remains consistent on both versions, making this an efficient and repeatable layout.
Overall, I’m so happy with how these turned out. Simple, classic, and ready to grab the next time I need a birthday card for a guy!
Cardstock Cuts for this project:
Mossy Meadow – 8-1/2″ x 5-1/2″ scored at 4-1/4
Nature Walk DSP – 5-1/4″ x 4″ panel from green; 4-1/2″ x 3-1/2″ panel from script
Basic White – 5-1/4″ x 4″ inside panel; 2-1/4″ x 2-1/4″ for Circle
Stampin’ Up! products used to create this project:
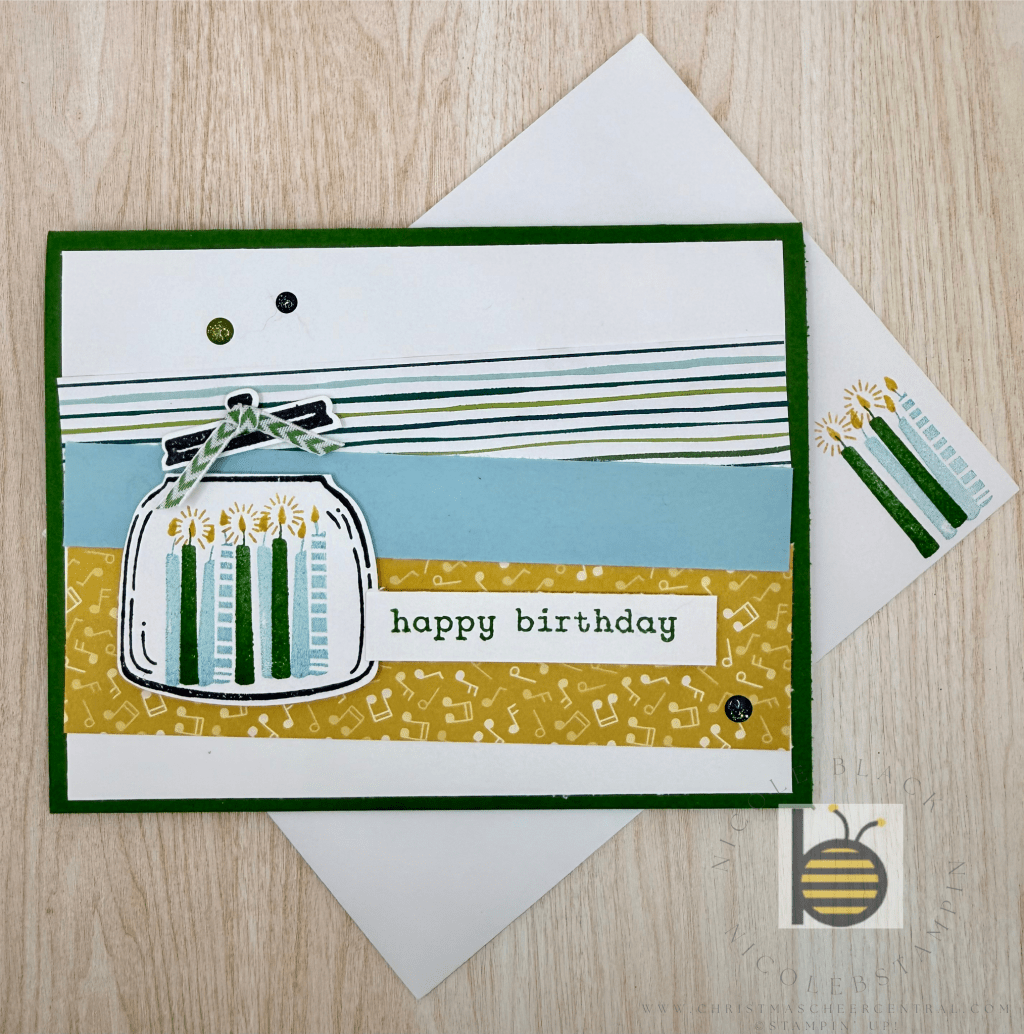
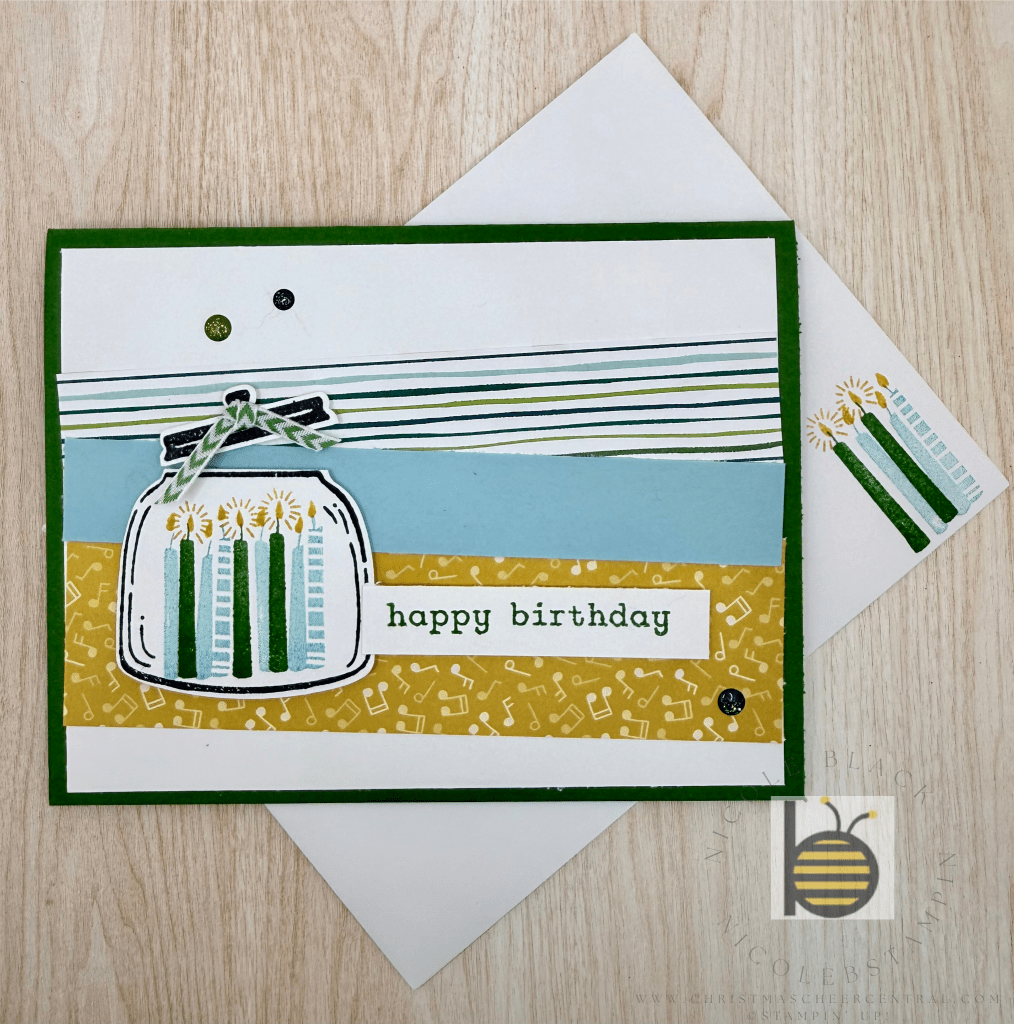
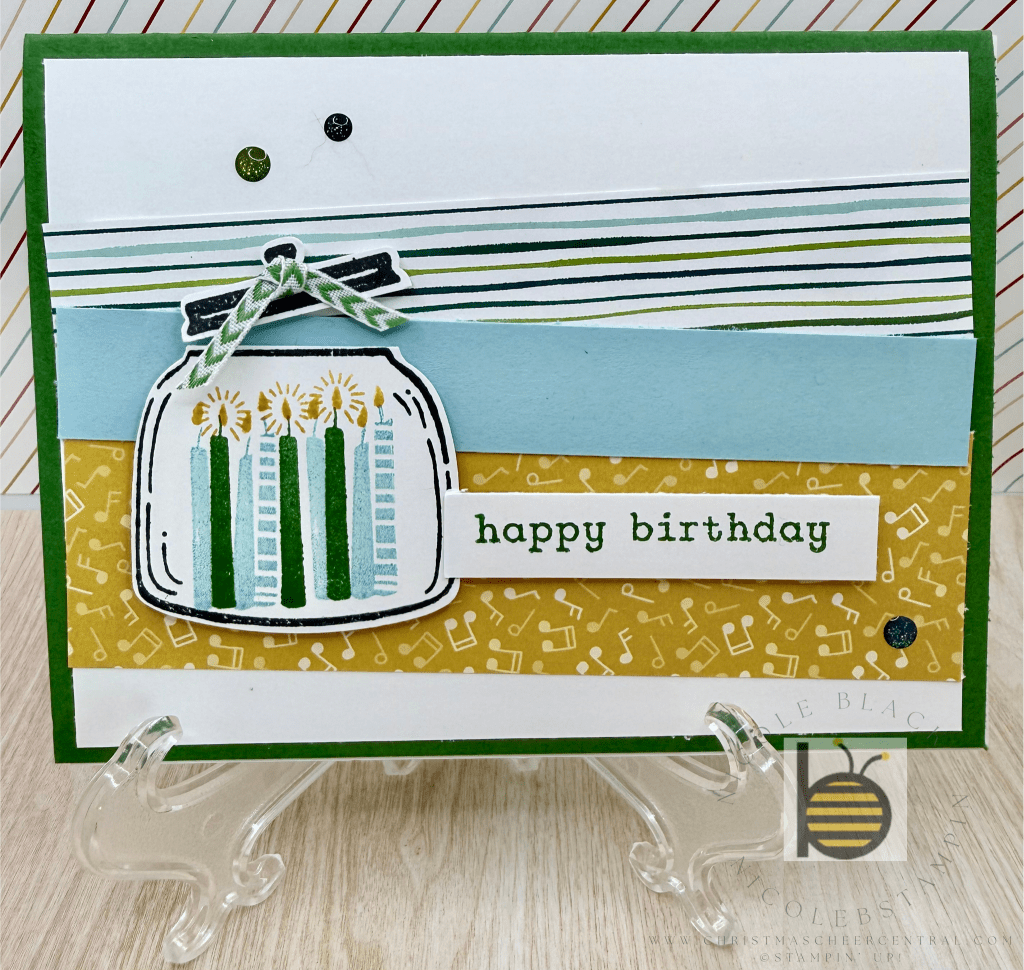
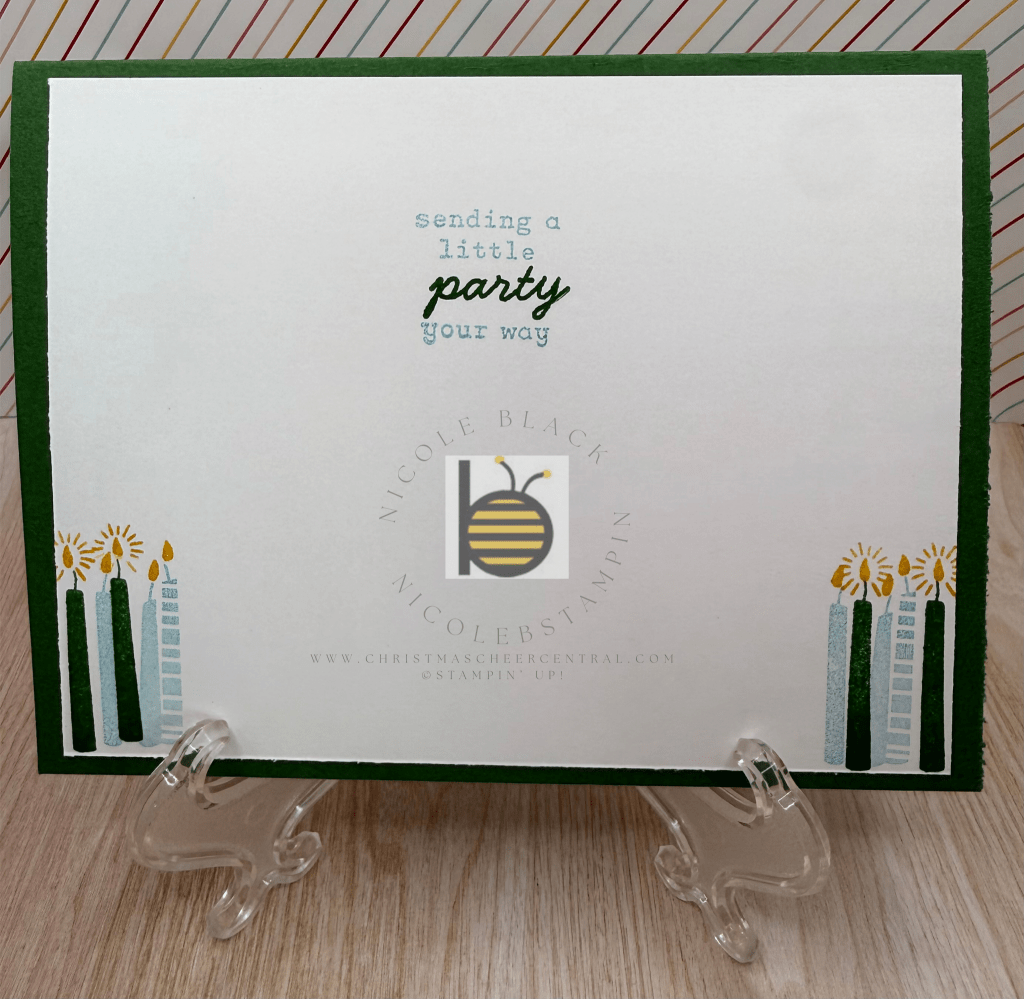
I had so much fun stamping with the Jar of Joy set at Christmas () that I couldn’t wait to create with the Sweet Jar set, too! For this project, I designed a fun, gender-neutral birthday card that can easily be recreated using any Designer Series Paper you have on hand. With endless color combinations to choose from, it’s a design you can make again and again while getting a completely different look each time.
To add a little whimsy, I intentionally placed the strips of paper at slight angles. The crooked layout gives the card a playful feel—but if that makes your inner perfectionist twitch (and I know it did for some of my stamping friends!), you can absolutely line them up straight for a cleaner look.
The jar, lid, and sentiment are all popped up with dimensionals to give the card extra depth. A bit of ribbon and a few embellishments finish it off and add just the right amount of fun texture.
One of my favorite things about this stamp set is the sentiments. They’re designed so you can build your own greeting, which makes it easy to mix and match colors and create something a little different every time.
Plan the cheer. Stamp the joy. 🎄 Nicole | nicolebstampin Christmas Cheer Central Christmas planning inspiration and stamping fun all year long
Cardstock Cuts for this project:
Garden Green – 8-1/2″ x 5-1/2″ scored at 4-1/4
Turtle-y Cute DSP – 5-1/4″ x 1″ Panel, 5-1/4″ x 1-1/2″ Panel
Balmy Blue – 5-1/4″ x 3/4″ Panel
Basic White – 5-1/4″ x 4″ inside panel, 5-1/4″ x 4″ panel, 2-1/2″ x 2-1/2″ for Jar Punch, 2-1/2″ x 1/2″ panel for words
Stampin’ Up! products used to create this project:
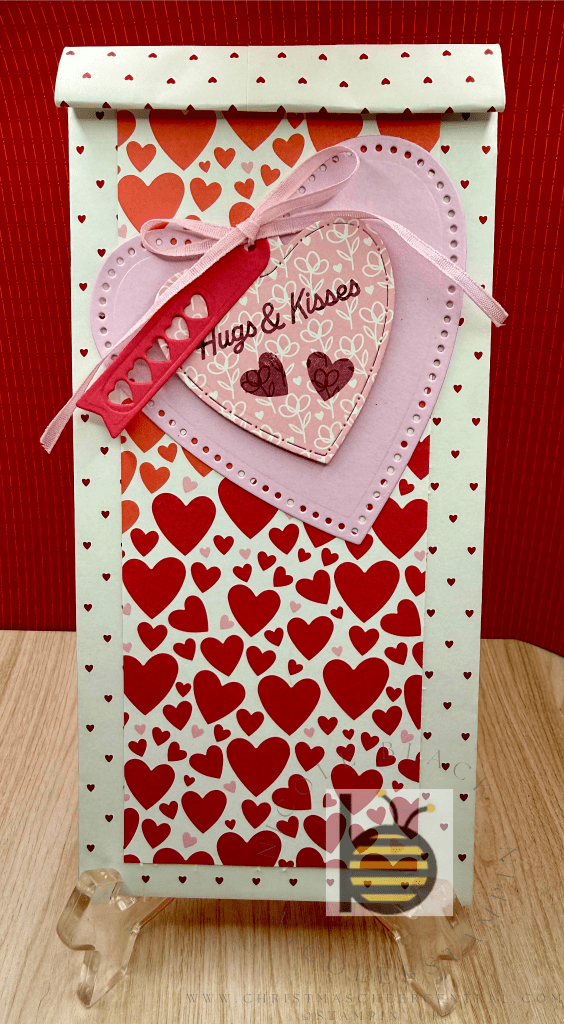
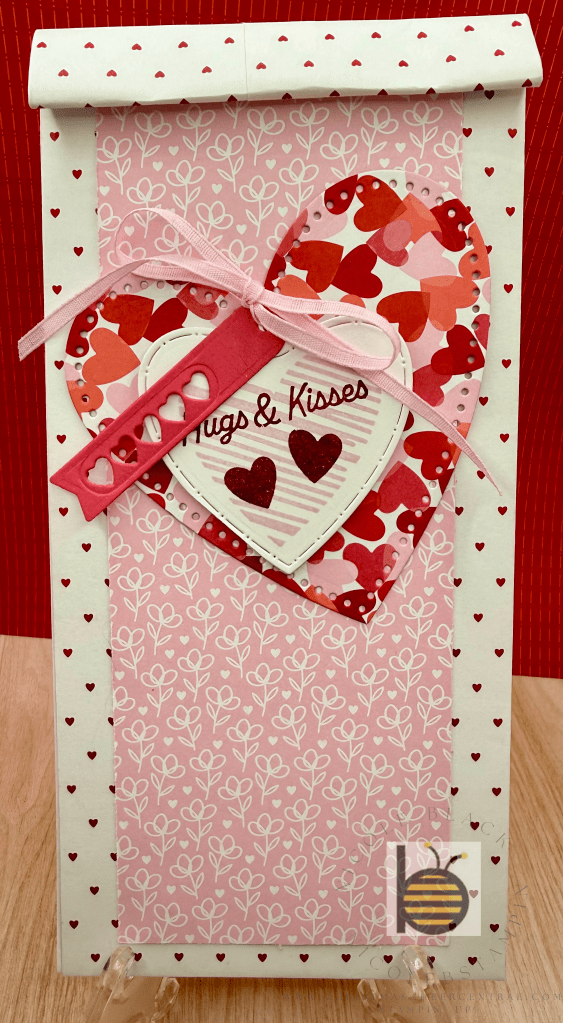
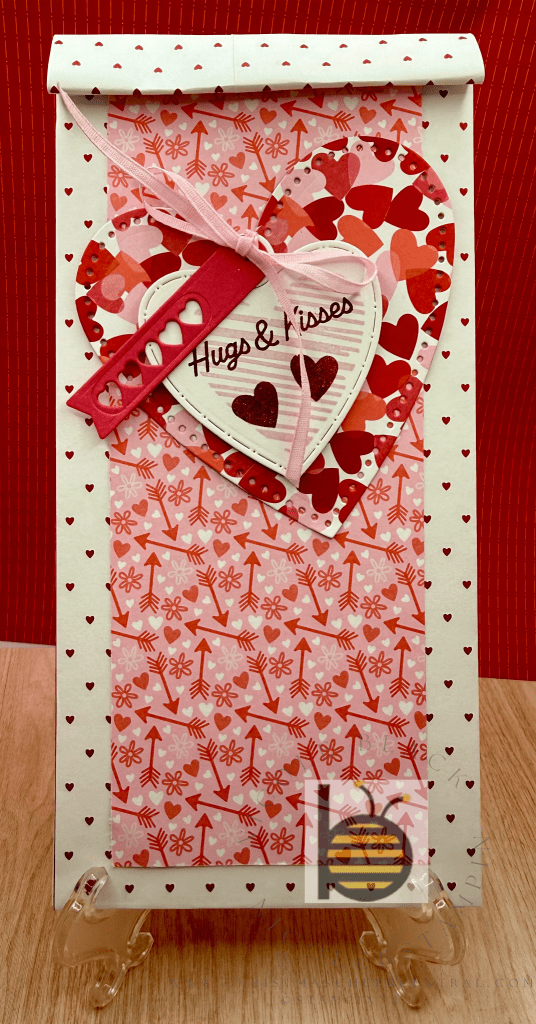
For my final project with the Endless Love Suite, I created festive gift bags filled with delicious sweet treats for friends and colleagues. These Heart Gusseted Treat Bags are the perfect canvas for Valentine’s creativity — and they’re just as practical as they are cute!
I mixed and matched the Made With Love Designer Series Paper, coordinating dies, and stamps to decorate the front of each bag. By varying the designs, I was able to showcase more of the beautiful patterns and have a little extra fun with the papers.
And the best part? These treat bags hold a lot of goodies, making them perfect for sharing a generous dose of Valentine’s cheer.
Cardstock Cuts for this project:
Made With Love DSP – 7-1/2″ x 3″ panel; 2-1/2″ x 2-1/2″ for Heart
Bubble Bath – 4″ x 3-3/4″ for Heart
Strawberry Slush – 2-1/2″ x 3/4″ for Label
Stampin’ Up! products used to create this project:
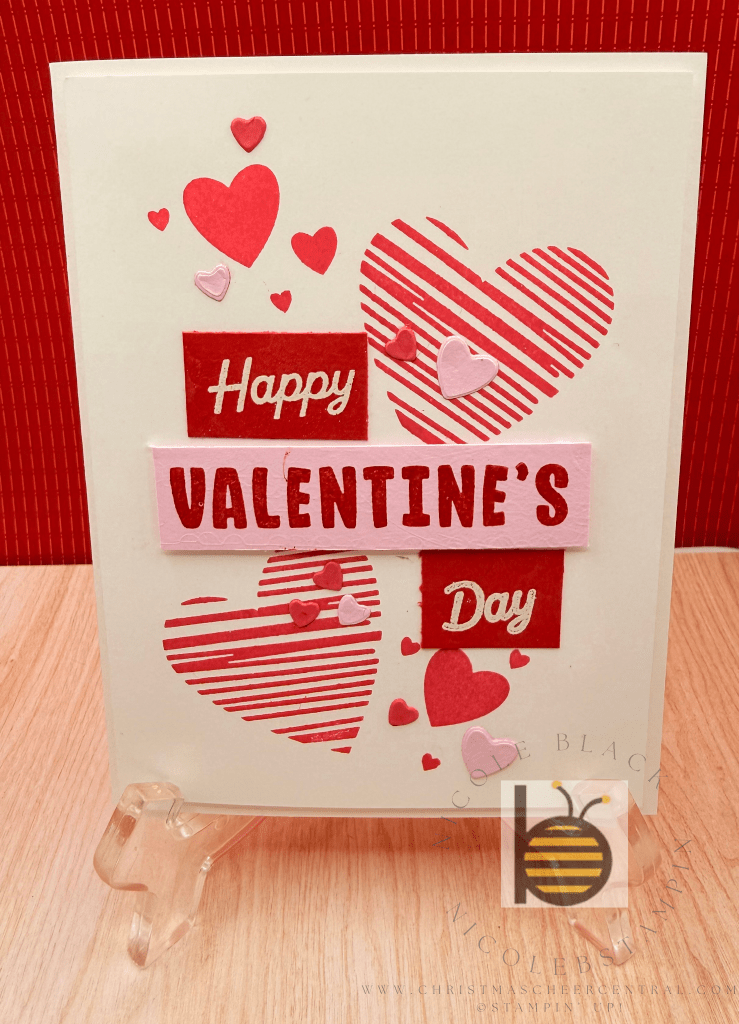
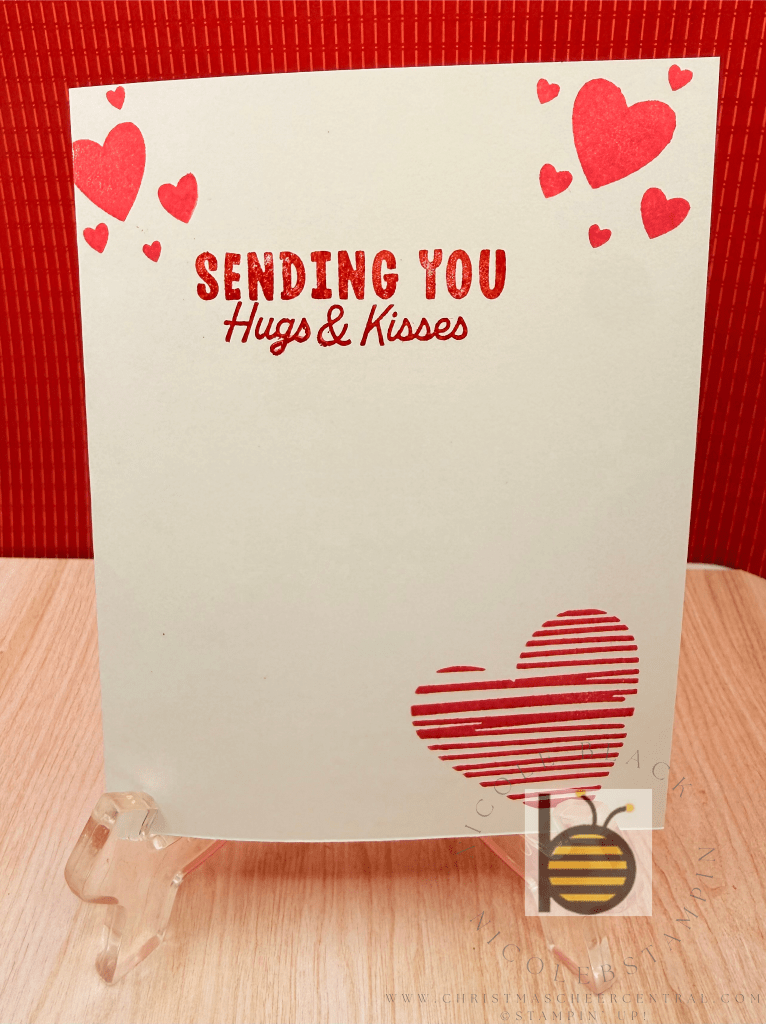
I’m back with another Valentine’s Day card created with the Endless Love Suite, and this one leans into a little extra whimsy — which always feels just right for Valentine’s Day.
The base of the card is built from simple layers of white, giving me the perfect canvas to let the stamped hearts and bold sentiments take center stage. I heat embossed “Happy” and “Day” on small strips of Poppy Parade cardstock and stamped “Valentine’s” in Bubble Bath to tie the whole color story together.
Then came the fun part! I scattered stamped hearts across the front of the card and layered the words right over top. To add to the playful feel, I glued tiny die-cut hearts all around the design, creating movement and texture.
I carried the heart stamping to the inside of the card for a cohesive finish. Looking back, I think adding a few of those die-cut hearts inside would have been an extra sweet touch — something I’ll definitely try next time!
Valentine’s Day cards are the perfect excuse to embrace a little whimsy, and this one was such a joy to create.
Cardstock Cuts for this project:
Basic White Thick – 8-1/2″ x 5-1/2″ scored at 4-1/4
Basic White – 5-1/4″ x 4″ panel
Bubble Bath – 3″ x 3/4″ for Words; Scrap for Hearts
Poppy Parade – 1-1/4″ x 3/4″ for Words; 1″ x 3/4″ for Words
Strawberry Slush – Scrap for Hearts
Stampin’ Up! products used to create this project:
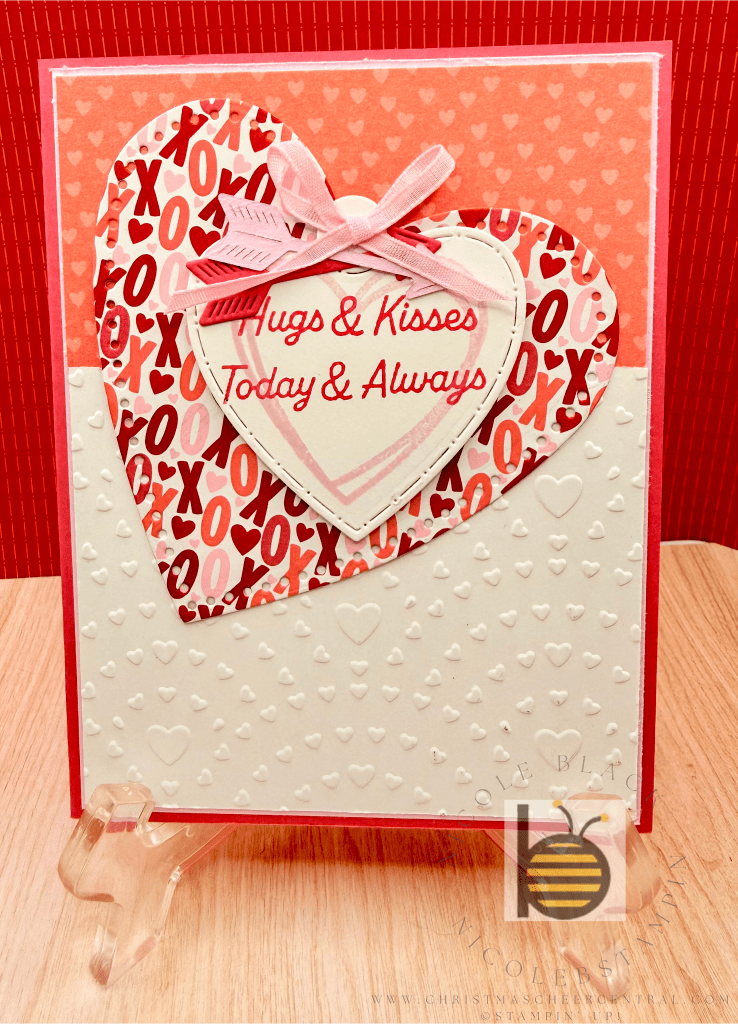
Valentine’s Day is right around the corner, and I’m excited to start sharing the projects I created using the Endless Love Suite. I had so much fun designing several Valentine’s Day cards and even a coordinating gift, and I’ll be sharing each one with you over the next few days.
Today’s card is a simple design that really lets the Made With Love Designer Series Paper shine. The soft patterns create beautiful built-in layering without needing a lot of extra elements.
To add dimension, I popped up a white heart and tied in a bit of ribbon for texture. After photographing the card, I couldn’t resist adding a few Strawberry Slush and Pretty In Pink Gems for just the right touch of sparkle.
I finished the inside with a sweet sentiment and a subtle double-heart watermark for a polished, cohesive look from front to back.
Stay tuned for more Valentine’s inspiration coming soon! 💗
Cardstock Cuts for this project:
Strawberry Slush – 8-1/2″ x 5-1/2″ scored at 4-1/4″; 2-1/4″ x 1″ for Arrow
Made with Love DSP – 4″ x 3-3/4″ for Heart; 4″ x 3″ panel
Basic White – 5-1/4″ x 4″ inside panel; 4″ x 3-1/4″ panel; 2-1/2″ x 2-1/2″ for heart
Bubble Bath – 5-3/8″ x 4-1/8″ panel; 2-1/4″ x 1″ for Arrow
Stampin’ Up! products used to create this project:
The New Year has arrived, but Christmas still lingers in the soft glow of lights and carefully placed décor around the house. I don’t rush this part of the season. For me, packing up Christmas is the final, intentional step—one that closes the chapter while quietly preparing for an even smoother holiday next year.
Over the years, I’ve found that a little strategy now makes decorating far more enjoyable later. Here’s how I reset after the holidays with calm, clarity, and a plan.
Pause Before You Pack
Before a single ornament comes down, I document everything. I take photos of each room and save them in a dedicated “Decorations” section in my OneNote. This has become one of my most valuable holiday tools.
These photos capture more than décor—they capture ideas, layouts, and the overall feel of the season. When next November rolls around, I’m not guessing what worked or trying to remember where things went. I can recreate favorite displays or tweak them with confidence, without starting from scratch.
Store with Intention
Thoughtful storage is the secret to stress-free decorating next year. I always pack up Christmas one room at a time, keeping items for each space together in clearly labeled bins. When it’s time to decorate again, I can work at my own pace—room by room—without pulling out everything at once.
I also take a moment to reassess my storage setup each year. Are the bins still working? Is there a better way to use the space I have? A little organizing now saves time, space, and frustration later.
Wrapping Up the Season
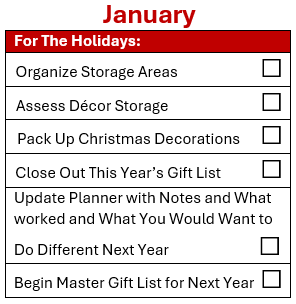
Once the décor is tucked away, I shift into reflection mode. January is the perfect time to close the loop on the holidays:
Gift Lists: I archive this year’s gift list in my tracking app. Having a history of what I’ve given makes future planning easier and more thoughtful.
Next Year’s Ideas: I start a fresh gift list for the coming year. Inspiration doesn’t follow a calendar, and capturing ideas as they pop up makes December far less hectic.
Season Notes: I jot down quick reflections—what cookies were a hit, which gatherings felt just right, and which traditions brought the most joy. These “lessons learned” notes help me refine the season year after year.
A Gentle Ending
Packing up Christmas doesn’t have to feel like an obligation or a letdown. When done with care and intention, it becomes a satisfying reset—one that honors the season while quietly preparing for the next. By documenting, organizing, and reflecting now, I give myself the gift of ease, creativity, and joy when Christmas returns again.
I am a project manager by day and a crafter by night. I love Christmas and want to do it all every year. I will share with you how I do it and enjoy it too!